


 Outdoor stairs without railings can be risky, especially in rainy or snowy weather. A proper railing not only keeps your family and guests safe but also adds value and charm to your home’s exterior. Whether you are planning to build a new staircase or update an existing one, here is a clear and easy four-step guide to help you understand the process of installing railings.
Step 1: Position the Posts
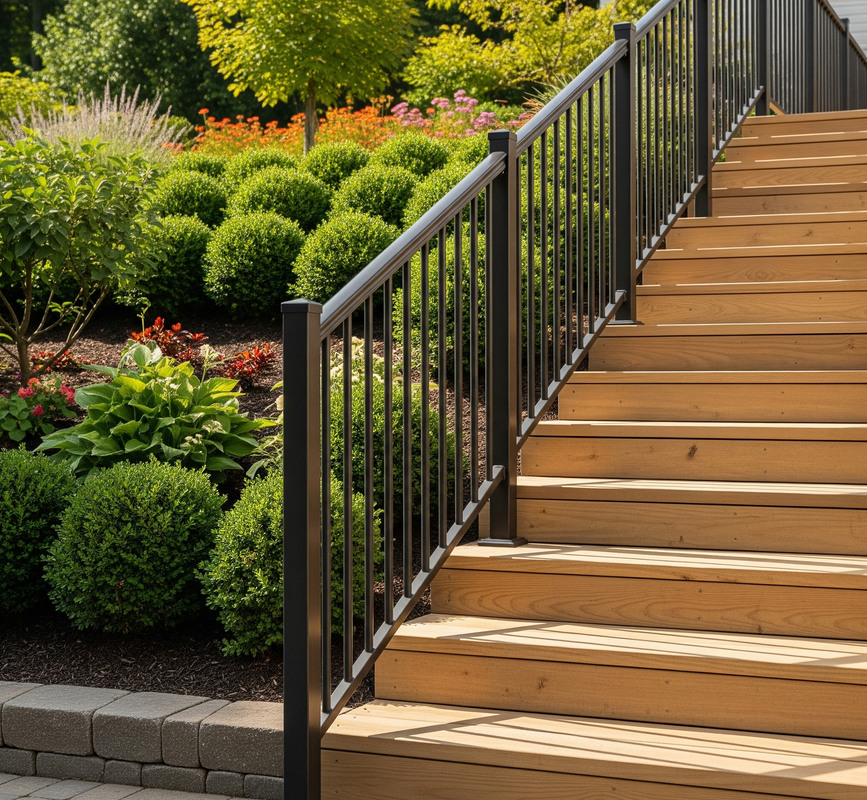
Start by setting up the posts, which are the upright parts that hold up the railing. You’ll usually need one post at the bottom and one at the top of the stairs. Make sure they’re lined up and attached tightly with strong screws. For wood steps, this is usually simple. For stone or concrete, use anchors to keep the posts in place. This step is important because if the posts aren’t solid, the railing won’t feel safe.
Step 2: Install the Rails
After the posts are set, attach the horizontal rails. The top rail is the handrail, and some stairs also have a bottom rail for extra support. Carefully measure your stair angle so you can cut the rails to fit. Use brackets or screws to secure them to the posts. Check that everything is straight and tight. A sturdy rail will keep your stairs safe for years.
Step 3: Secure the Balusters
Balusters are the vertical pieces that fill the space between the top and bottom rails. They are important for both safety and design. Place them evenly and keep the spacing small enough to prevent accidents, especially for children or pets. Pre-marking where each baluster goes can help make the installation smoother. Make sure they are straight and secure once installed.
Step 4: Do a Final Check and Seal the Wood
After everything is installed, walk through the setup and inspect your work. Gently shake the railing to make sure it is sturdy. Tighten any loose screws. If your railing is made of wood, consider applying a weather-resistant stain or sealant to protect it from rain, snow, and sun. Also, look up your local building codes to make sure your railing meets height and spacing requirements.
Adding railings to your outdoor stairs is a smart upgrade. It makes your stairs safer and gives them a polished look. If you’re ready to get started or want more details, check out this helpful resource on installing railings. It has clear tips and visuals, whether you’re doing the work yourself or hiring someone.
Comments (0)